
22 Jun
The 4th of July line is getting great reviews.
Here is a brief step-by-step instruction on doing the USA Flag. You will absolutely love it! And, the instructions can be used for any wood decor project you want. In no time at all, you'll be decorating like a pro!
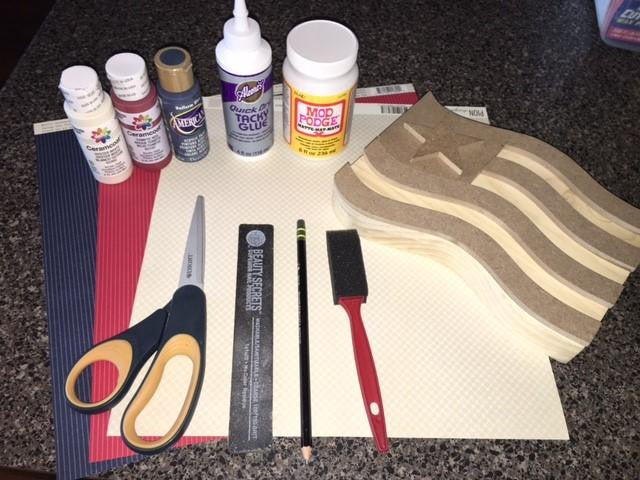
First, get your supplies ready. For this project, you'll need paint, pattern paper, Mod Podge (optional), scissors, pencil, paint brush, glue, matte clear spray paint (optional), and a file.

Next, trace your pieces. Then, cut the pieces by cutting your trace marks.

Next, paint all your pieces. (Hint: On anything getting covered by paper, you only need to paint the outside and the edges.)

Next, using Mod Podge or any general or wood glue, spread the glue thin and evenly on the top of the wood and place your paper on it. Be sure to smooth out any bumps or wrinkles.

Once the paper is dry, use a file and sand the paper so it's flush with the wood all the way around. This also creates a cute decorative edge and smooths out any scissor marks.

After all your pieces are covered and sanded use glue to glue them on the base.

Glue the canton (the blue piece) first. Then, the top and bottom stripes (red pieces). That way it's easy to center the other pieces.

Finally, add any buttons, ribbons, or string you'd like.
Then, this part is optional, we like to use a clear matte spray to put a nice finish over the project.

Yay! You've made a darling flag decoration.
Recent Articles
Magnetic Shadow Boxes and monthly kits
Paper File Trimming
Wood Projects have amazing versatility in the store and for the customer!
Tags

